
Your microblading procedure might last only an hour, but the aftercare determines whether your brows fade prematurely or stay crisp for years. Many clients invest in beautiful brows only to watch them blur or disappear within months because they skipped crucial healing steps. What is the best aftercare for microblading? It starts the moment you leave your appointment and extends through a full healing cycle of four to six weeks.
The pigment sits in the upper dermis layer of your skin, not on the surface. This means your body’s natural healing response directly impacts how the color sets. Skip the ointment, expose fresh strokes to chlorine, or pick at scabs, and you risk patchy results that require expensive correction. Proper aftercare protects both your brows and your investment.
At Arezoo Beaute, Arezoo has refined her aftercare protocol since becoming the first PhiBrows Master in Montreal in 2016. Her PHI Academy training emphasizes that the artist’s precision means nothing if the client doesn’t follow through at home. This guide breaks down each phase of healing with the same detail-oriented approach used during the procedure itself.
You’ll learn exactly what to apply, what to avoid, and how to recognize normal healing versus complications. Whether you just left your appointment or are planning ahead, these protocols come directly from over nine years of permanent makeup experience across thousands of healed brows.
Understanding the Microblading Healing Process
Microblading creates controlled micro-wounds in your skin. The body responds by forming a protective scab over each hair stroke within the first 24 hours. This is not a thick, crusty scab like a knee scrape. Instead, you’ll notice a thin film that makes the strokes appear darker and slightly raised.
Days one through three bring the most dramatic changes. Your brows will look bold, almost too dark. This is completely normal. The pigment sits at the surface before settling into the dermal layer. By day four, light flaking begins as the protective layer naturally sheds.
The flaking phase lasts roughly three to seven days. During this time, strokes may appear patchy or even seem to disappear. Resist the urge to pick or speed up the process. Premature removal pulls out pigment that hasn’t properly set, creating gaps in the final result.
Weeks two through four reveal what artists call the “ghost phase.” Brows look faint as new skin forms over the pigment. The color resurfaces gradually as the skin completes its regeneration. Full healing takes six weeks, which is why touch-up appointments are scheduled after this period.
Immediate Aftercare: The First 24 Hours
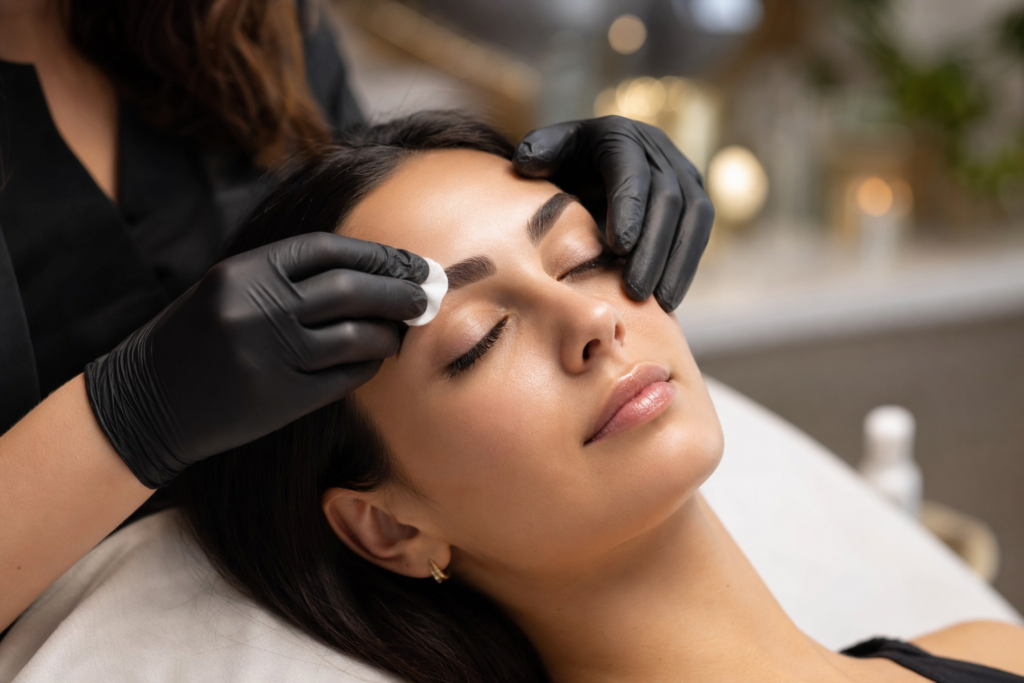
The first day sets the foundation for everything that follows. Your artist will apply a protective barrier cream before you leave, but lymph fluid will continue seeping from the strokes for several hours. This clear liquid can oxidize the pigment if left to dry on the surface, creating darker, less natural-looking results.
Gently blot your brows every 30 minutes for the first three hours using a clean, damp cotton pad. Pat softly, don’t wipe. You’re removing excess lymph, not scrubbing away the treatment. After each blot, allow the area to air dry for one minute before applying a rice-grain-sized amount of aftercare ointment.
Arezoo provides pharmaceutical-grade aftercare cream to every client at Arezoo Beaute, formulated specifically for PMU healing. Avoid petroleum-based products like Vaseline, which can suffocate the skin and trap bacteria. The ointment should create a thin protective layer, not a thick, greasy coating.
Sleep on your back this first night if possible. Your pillowcase should be clean, ideally changed just before bed. If you typically sleep on your side, place a clean towel over your pillow to minimize friction against your brows. Avoid touching your face with your hands throughout the night.
Days 2-10: The Critical Healing Window
This phase requires the most discipline. Your skin is actively repairing itself, and every choice you make influences the final outcome. Continue applying aftercare ointment two to three times daily, always with clean hands washed thoroughly with antibacterial soap.
Water contact should be minimal and strategic. You can shower, but keep your face out of the direct stream. When washing your face, use a gentle cleanser around the brow area without directly saturating the strokes. Pat dry with a clean paper towel, never a reused cloth towel that may harbor bacteria.
The itching starts around day three. This is your skin healing, not a sign of infection. Do not scratch, rub, or pick at any flaking skin. Let the flakes fall naturally, even if they hang off your brows for a day. Forcing them off removes pigment permanently from those areas.
Avoid all makeup on and around your brows during this period. This includes eyebrow pencils, powders, and even concealer near the hairline. Makeup products introduce bacteria and prevent proper oxygen flow to healing skin. The team at Arezoo Beaute emphasizes this point during every consultation, as makeup application is one of the top reasons for uneven healing in Montreal’s humid summer months.
What to Avoid During Microblading Healing
Certain activities and products can sabotage your results even if you follow all other steps correctly. Sweat is one of the biggest culprits. Skip intense workouts, hot yoga, and saunas for the full ten days. Sweat contains salt and toxins that push out fresh pigment while bacteria enters the open micro-wounds.
Swimming pools and natural bodies of water are strictly off-limits for two weeks minimum. Chlorine, salt water, and lake bacteria cause infections and fade pigment rapidly. If you’re planning a beach vacation, schedule your microblading appointment at least three weeks after you return, not before.
Sun exposure and tanning beds accelerate pigment fading both during healing and long-term. UV rays break down the pigment molecules, turning rich brown tones ashy or orange over time. Apply SPF 30 or higher around your brows once healing is complete, and wear a hat during peak sun hours.
Retinol, glycolic acid, and other exfoliating skincare ingredients should stay far from your brow area. These actives speed up skin cell turnover, which sounds beneficial until you realize they’re pushing out your microblading pigment along with dead skin cells. Create a two-centimeter buffer zone around your brows when applying these products.
AREZOO BEAUTÉ
Ready to enhance your natural beauty?
Book your consultation today and let our expert team help you choose the perfect treatment for your goals.
Choosing the Right Aftercare Products
Not all aftercare ointments are created equal. The best products contain minimal ingredients focused on moisture retention and antimicrobial protection. Look for formulas with vitamin E, grapeseed oil, or rice bran oil as primary ingredients. These penetrate without clogging pores or creating a barrier that traps heat.
Avoid products with mineral oil, coconut oil, or shea butter. While these sound natural and nourishing, they’re too heavy for the delicate brow area during healing. Heavy oils can blur the crisp hair strokes that make microblading look realistic, creating a softer, more powdered effect instead.
Some clients prefer healing dry without any ointment after day three. This method works for certain skin types, particularly those prone to oiliness. However, most artists including Lelia and Armineh on the brow team at Arezoo Beaute recommend light moisture throughout the full healing phase to prevent excessive scabbing that pulls out more pigment.
Your artist may recommend a specific brand based on your skin type and the technique used. Combo brows, which blend microblading strokes with shaded powder, may require slightly different aftercare than traditional hair strokes alone. Always follow the protocol provided at your appointment rather than general internet advice.
Long-Term Maintenance for Lasting Results
Once your brows fully heal at the six-week mark, maintenance shifts from active healing to pigment preservation. Your touch-up appointment corrects any areas where pigment didn’t take evenly and allows your artist to adjust color or shape based on how your skin accepted the initial strokes.
Most clients need annual touch-ups to maintain optimal color and definition. Oily skin types may require refreshes every eight to ten months, while dry skin can stretch to 14 or even 18 months. Arezoo uses the PHI golden ratio method to map each client’s unique facial structure at Arezoo Beaute, ensuring touch-ups maintain perfect symmetry as your natural brows continue to grow and change.
Daily sunscreen becomes your most important product post-healing. Apply SPF 30 or higher every morning, even in Montreal’s cloudy winter months. UV exposure is the number one cause of premature fading and unwanted color shifts. Mineral sunscreens with zinc oxide work best, as chemical formulas can sometimes react with certain pigments.
Exfoliating treatments like microdermabrasion, chemical peels, and even aggressive scrubs should avoid the brow area permanently. Book these treatments carefully, informing your esthetician about your permanent makeup. If you’re interested in other services like Hydrafacial treatments, make sure to mention your microblading so the technician can work around the brow zone.
Recognizing and Addressing Healing Complications
Normal healing includes redness, slight swelling in the first 24 hours, itching around day three, and flaking through day ten. Abnormal signs require immediate attention. Excessive redness that spreads beyond the brow area, pus-like discharge, or fever indicate possible infection.
If you notice these symptoms, contact your artist immediately and consult a doctor. Infections are rare when proper aftercare is followed, but they require prompt treatment with antibiotics. Never apply antibiotic ointment without professional guidance, as some formulas can pull out pigment.
Allergic reactions to pigment are extremely uncommon but possible. These appear as raised, itchy bumps specifically along the microbladed strokes, not general skin irritation. True allergic reactions usually manifest within the first week and require dermatological evaluation.
Uneven healing is the most common “complication,” though it’s rarely a true problem. One brow may flake faster than the other, or certain sections may appear lighter after the ghost phase. This is why touch-up appointments exist. At your six-week follow-up, your artist will fill in any gaps and perfect the overall result. The free consultation offered at Arezoo Beaute includes a thorough discussion of your medical history and skin type to minimize unexpected healing outcomes.
Frequently Asked Questions
Can I wear makeup during microblading healing?
Avoid all makeup on and around your brows for the first ten days minimum. Makeup introduces bacteria to the open micro-wounds and prevents proper oxygen flow needed for healing. You can apply makeup to other areas of your face, but keep products at least two centimeters away from your brow area. After day ten, if flaking has completely finished, you can cautiously apply makeup around but not directly on the strokes. Wait until your six-week touch-up appointment before using brow-specific products like pencils or powders.
How often should I apply aftercare ointment?
Apply a thin layer of aftercare ointment two to three times daily for the first ten days. Use clean hands and only a rice-grain-sized amount per brow. Too much ointment can suffocate the skin and cause pigment to heal lighter or patchier. Some artists recommend stopping ointment completely after day three if your skin type tends toward oily, while others suggest continuing light application through day seven for dry skin types. Follow the specific protocol your artist provides based on your individual skin assessment.
What happens if I accidentally get my brows wet?
Brief water contact won’t ruin your results, but prolonged saturation can. If your brows get wet in the shower, gently pat them dry immediately with a clean paper towel. Don’t panic or over-handle the area. The key is avoiding standing water, steam, and prolonged moisture that softens scabs and pulls out pigment. One accidental splash is very different from swimming or sitting in a steam room. If significant water exposure occurs, apply your aftercare ointment once the area is completely dry to restore the protective barrier.
Why do my brows look patchy after the scabs fall off?
This is the normal ghost phase that occurs between weeks two and four. As new skin forms over the pigment, the color temporarily appears faint or uneven. The strokes haven’t disappeared; they’re simply hidden under fresh skin cells that will gradually become translucent as healing completes. By week six, you’ll see the true result. Some patchiness is also expected because skin doesn’t retain pigment uniformly across the entire brow on the first application. This is precisely why touch-up appointments are scheduled, allowing your artist to fill in any lighter areas and perfect the overall appearance.
Can I exercise after getting microblading done?
Avoid all workouts that cause sweating for ten full days after your procedure. This includes running, cycling, weight training, hot yoga, and any cardio activity. Sweat contains salt and bacteria that can cause infections while also pushing fresh pigment out of the skin before it properly sets. Light walking is acceptable as long as you’re not perspiring. After day ten, you can gradually return to normal activity, but wipe your face immediately after exercising and avoid letting sweat sit on your brows. High-intensity athletes often schedule microblading during planned rest weeks to minimize disruption to their training.
Your Aftercare Determines Your Results
The best aftercare for microblading combines gentle moisture, strict activity restrictions, and patience through each healing phase. Your artist’s skill creates the foundation, but your commitment to the aftercare protocol determines whether those strokes stay crisp and beautiful for years or fade within months. Arezoo’s PHI certification and nine years of experience have refined these protocols at Arezoo Beaute, where the 4.9 Google rating reflects clients who followed through with proper healing care.
Ready to start your microblading journey with proper guidance from consultation through final touch-up? Book your free consultation at Arezoo Beaute in Montreal. The team will assess your skin type, discuss your goals, and provide a detailed aftercare plan customized to ensure your brows heal beautifully. Call (514) 814-8007 or visit the salon at 2305 Rockland Rd, Unit 1590, to meet with Arezoo and her certified brow specialists.
