

If you’ve just gotten microblading done, you’re probably wondering how to maintain your normal skincare routine without jeopardizing your investment. The simple answer: yes, you can wash your face after microblading, but timing and technique matter significantly. Understanding exactly when and how to wash your face after microblading determines whether your brows heal beautifully or lose pigment prematurely.
This guide covers everything you need to know about washing your face during the microblading healing process. You’ll learn the critical first 24 hours, step-by-step washing techniques that protect your brows, how to shower without getting your eyebrows wet, what to do if water accidentally touches your brows, and which face cleansers support optimal healing. Following proper aftercare protocols helps optimize your microblading results and supports retention for the full duration of 12 to 18 months.
Quick Answer
You can wash your face immediately after microblading, but you must avoid getting your eyebrows wet for the first 10 to 14 days. Use gentle cleansers on your cheeks, nose, and chin while carefully protecting your brow area from water, soap, and steam during the critical healing period.
When Can You Wash Your Face After Microblading?
The timing of face washing after microblading follows a specific protocol designed to protect the delicate pigment deposits in your skin. Your microblading artist creates tiny incisions in the epidermis and implants pigment into each hair-like stroke. During the first two weeks, these incisions must remain dry to prevent premature scabbing, infection, or pigment loss.
At Arezoo Beaute, clients receive detailed aftercare instructions immediately following their procedure. As Montreal’s first PhiBrows Master, Arezoo has refined these protocols over nine years of permanent makeup practice to maximize pigment retention and minimize complications.
First 24 Hours: Critical Restrictions
The first 24 hours after microblading represent the most vulnerable period for your new brows. During this time, your skin produces lymph fluid, a clear liquid that surfaces around the microblading strokes. This fluid carries excess pigment and cellular debris away from the treatment site.
You must keep your eyebrows completely dry during these initial 24 hours. No water, no cleansers, no steam, and absolutely no touching. Even gentle patting or wiping can disturb the pigment placement and damage your results.
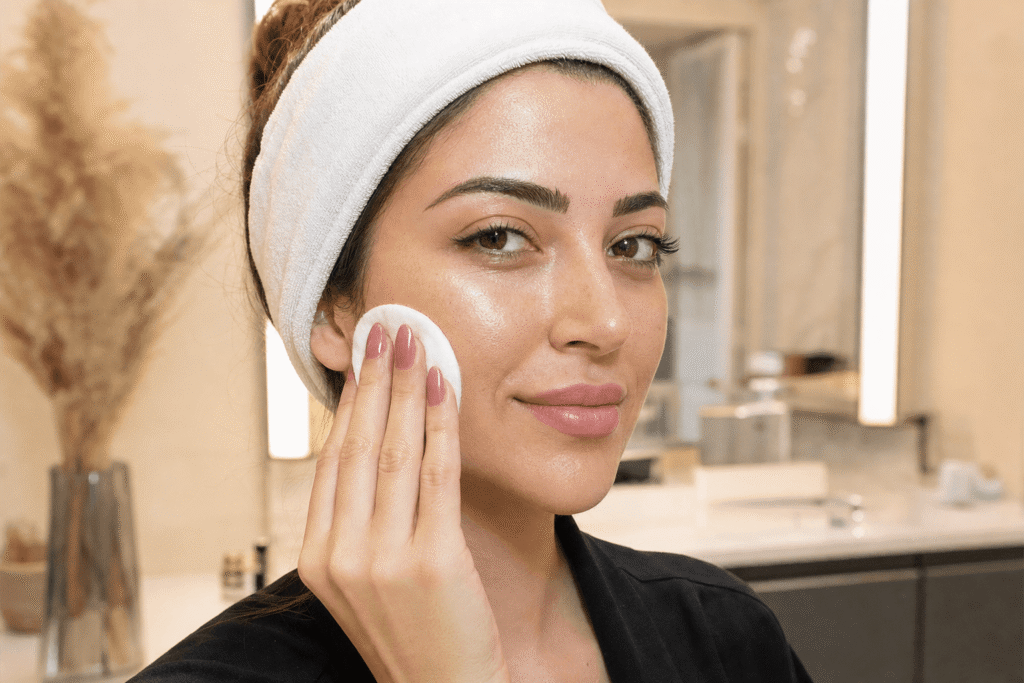
You can wash the rest of your face using careful techniques that keep water away from your eyebrow area. Many clients find it easiest to use facial wipes or micellar water on cotton pads for areas below and beside their brows during this critical first day.
Days 2-14: Modified Face Washing Protocol
From day two through day 14, you transition to a modified face washing routine. Your eyebrows must still remain dry, but you can resume more thorough cleansing of your other facial areas using proper protective techniques.
During this two-week period, your microbladed brows move through several healing phases. Water exposure during any of these phases can soften scabs prematurely, causing them to separate from the skin before the underlying tissue has fully healed. This leads to patchy pigment retention and potentially requires additional touch-up work.
After day 14, most clients can return to their normal face washing routines, though gentle handling remains important until the six-week mark when healing completes fully. Your touch-up appointment, typically scheduled 6 to 8 weeks after the initial procedure, addresses any areas where pigment faded during healing.
Key Takeaways
- Keep eyebrows completely dry for the first 24 hours after microblading
- Use protective techniques to wash face while avoiding brow area entirely
- Expect 10 to 14 days of water restrictions during critical healing
- Choose gentle, fragrance-free cleansers for facial areas below eyebrows
- Schedule touch-up appointments 6 to 8 weeks after initial procedure
How to Properly Wash Your Face After Microblading (Step-by-Step)
Mastering the technique of washing your face while protecting your microbladed eyebrows requires a systematic approach. The goal is maintaining facial hygiene and your existing skincare routine while creating a protective barrier around your brow area.
Before beginning any face washing during the healing period, gather your supplies: a gentle cleanser, clean lukewarm water, soft washcloths or cotton pads, and clean tissues for drying. Having everything ready prevents you from fumbling with products while water drips toward your eyebrows.
Washing Areas Below the Eyebrows (Cheeks, Nose, Chin)
Start with the areas furthest from your eyebrows to minimize any risk of water migration upward. Tilt your head backward slightly to encourage water to flow down and away from your brow line.
Dampen a soft washcloth or cotton pad with lukewarm water. Apply a small amount of gentle cleanser to the damp cloth, not directly to your face. This gives you better control over where the cleanser goes.
Working in small sections, gently cleanse your cheeks, starting from the outer edges and moving toward your nose. Use light circular motions without creating excessive lather or runoff. Rinse the washcloth frequently and squeeze out excess water before continuing.
For your nose and chin, use the same careful approach. Keep the washcloth barely damp rather than soaking wet. Pat these areas dry immediately after cleansing using a clean, soft tissue or towel.
Washing Areas Above the Eyebrows (Forehead Protection Technique)
Your forehead presents the biggest challenge because water naturally runs downward when you rinse. Place a folded, dry washcloth horizontally across your eyebrows, holding it firmly in place with one hand. This creates a physical barrier that catches any drips. With your other hand, use a barely-damp cotton pad to cleanse your forehead in horizontal strokes, working from your hairline down toward the protective cloth.
An alternative approach involves cleansing your forehead while leaning over a sink, face parallel to the floor. This orientation prevents gravity from pulling water down toward your eyebrows. Use extremely minimal water and immediately blot any moisture that approaches your brow area.
Expert Tip from Arezoo Beaute
Clients often underestimate how easily steam softens scabs. When washing your face, use cool or lukewarm water only, never hot water that creates steam. Even brief steam exposure in the first 10 days can compromise pigment retention significantly.
How to Shower After Microblading Without Getting Your Eyebrows Wet
Showering after microblading requires strategic planning to keep your eyebrows dry while maintaining your normal hygiene routine. The combination of water pressure, steam, and heat makes showering particularly risky during the healing period.
The most effective approach involves keeping your face completely out of the direct water stream. Tilt your head backward throughout your shower so water flows over your hair and down your back rather than cascading over your face. This position feels awkward initially but becomes natural after the first few attempts.
Many of our permanent makeup clients invest in a handheld showerhead specifically for the two-week healing period. This allows precise control over water direction and eliminates the risk of accidental face splashing. If you don’t have a handheld option, position yourself with your back to the fixed showerhead and rotate only when necessary.
For hair washing, lean your head back as far as comfortable and apply shampoo carefully to avoid drips running forward. Steam presents an invisible but significant threat to healing microblading. Keep your showers lukewarm rather than hot, limit shower duration to 10 minutes or less, and ensure good bathroom ventilation by running an exhaust fan or cracking a door.
AREZOO BEAUTE
Ready to enhance your natural beauty?
Book your consultation today and let our expert team help you choose the perfect treatment for your goals.
What Happens If Your Eyebrows Get Wet After Microblading?
Despite your best efforts, accidents happen. Understanding what occurs when water contacts your healing microblading helps you respond appropriately and minimize potential damage.
When water touches freshly microbladed brows during the first 24 hours, it can dilute the pigment before it has properly bonded with your skin tissue. The microblading strokes create channels that remain open during this initial period. Water can flush pigment out of these channels, leading to lighter results or patchy areas where color failed to retain.
If water contacts your brows during the scabbing phase (days 5 to 10), the primary risk involves premature scab softening and removal. Scabs protect the healing tissue underneath while new skin cells regenerate. When scabs lift too early, they take pigment with them, creating gaps in your final result.
Immediate Damage Control Steps
If your eyebrows get wet accidentally, follow these damage control steps immediately. First, blot the area gently with a clean, dry tissue using pressing motions only. Do not rub, wipe, or apply pressure. Second, allow the area to air dry completely for at least 30 minutes before applying any aftercare ointment. Third, avoid applying makeup or any products to the affected area for the remainder of the day.
Monitor the area closely for the next 24 to 48 hours. Some slight redness may occur but should resolve within hours. Take photos of the area at 24-hour intervals after the water exposure. This documentation helps you and your artist assess whether any permanent pigment loss occurred. Most minor water exposure causes minimal lasting impact, especially when addressed quickly with proper blotting technique.
Best Face Cleansers and Products to Use During Microblading Recovery
Selecting the right cleansing products for the areas around your microbladed eyebrows supports healing and prevents complications. Not all face cleansers work safely during the microblading recovery period.
Choose gentle, fragrance-free cleansers with minimal ingredients. Look for products labeled as suitable for sensitive skin or post-procedure care. The ideal cleanser has a neutral or slightly acidic pH between 5.0 and 6.5, matching your skin’s natural pH.
Recommended Product Types and Ingredients
Micellar water offers the safest option for face cleansing during microblading recovery. This no-rinse formula uses tiny micelle molecules to lift dirt and oil without requiring water. Apply with cotton pads for complete control around your brow area. Look for brands like Bioderma Sensibio H2O or La Roche-Posay Micellar Water Ultra.
Gentle cream cleansers work well for areas away from your eyebrows. CeraVe Hydrating Facial Cleanser and Cetaphil Gentle Skin Cleanser both contain soothing ingredients like ceramides and glycerin without harsh surfactants. These formulas calm inflammation and support skin barrier repair without interfering with pigment bonding.
Hypoallergenic face wipes designed for sensitive skin provide convenient cleansing during the first week. Simple Micellar Cleansing Wipes and Neutrogena Fragrance-Free Makeup Remover Wipes offer options without alcohol or essential oils.
Ingredients and Products to Avoid
Avoid any cleansers containing active ingredients like glycolic acid, salicylic acid, retinol, or vitamin C during the healing phase. These can interfere with pigment bonding even when applied to areas away from your brows.
Stay away from petroleum-based products that can suffocate healing skin. Alcohol-based formulas dry and irritate tissue. Products containing benzoyl peroxide can fade pigment prematurely. Any exfoliating scrubs, brushes, or tools risk disrupting the treatment area if accidentally contacted.
Sulfate-based foaming cleansers like those containing sodium lauryl sulfate strip natural oils too aggressively. Essential oils (tea tree, lavender, peppermint) can cause irritation. Fragrance compounds of any type should be avoided near healing microblading.
Expert Tip from Arezoo Beaute
Clients with oily skin often worry about keeping their T-zone clean during healing. Lelia, our microblading specialist, recommends oil-absorbing sheets for the forehead during the first week. They control shine without moisture that could threaten your brows.
Complete Microblading Aftercare Timeline: What to Expect During Healing
Understanding the complete healing timeline helps you anticipate changes in your brows and adjust your face washing routine accordingly. Microblading healing follows predictable phases, though exact timing varies slightly between individuals based on skin type, age, and aftercare compliance.
| Healing Phase | Timeline | What to Expect | Face Washing Protocol |
|---|---|---|---|
| Immediate Post-Procedure | Hours 0-24 | Slight redness, tender area, lymph fluid surfacing | Avoid eyebrow area completely, careful cleansing below brows only |
| Darkening Phase | Days 2-5 | Brows appear darker, slight swelling, color intensifies | Continue avoiding water contact, maintain protective washing techniques |
| Scabbing Phase | Days 5-10 | Thin flakes form over strokes, itching begins, color appears uneven | Most critical period for water avoidance, gentle face cleansing away from brows |
| Peeling Phase | Days 10-14 | Scabs naturally fall off, brows look patchy or too light | Continue water avoidance until all flakes completely shed |
| Color Return | Days 14-28 | True color gradually resurfaces, brows lighten to final shade | Can resume normal gentle face washing, avoid harsh scrubbing |
| Complete Healing | Days 28-42 | Final color settles, any adjustments noted for touch-up | Full normal skincare routine safe to resume |
During the darkening phase (days 2 to 5), your brows may appear significantly darker than expected. This temporary effect results from oxidation of the pigment and buildup of healing fluids. The color will lighten substantially during subsequent phases.
The scabbing phase (days 5 to 10) tests your patience most severely. Your brows may itch intensely as scabs form and tighten. Resist any urge to scratch, pick, or even touch the area. If itching becomes unbearable, gently press a clean tissue against the area rather than scratching.
Your skin type influences healing duration and face washing precautions. Oily skin tends to push out more pigment during healing and may require extended water avoidance. Dry or mature skin typically retains pigment better but may develop thicker scabs that take longer to shed naturally.
Differences in Face Washing Protocols Between Microblading Techniques
The specific permanent makeup technique you receive influences your face washing protocols and healing experience. While basic principles remain consistent, certain variations require modified approaches to aftercare and water exposure restrictions.
Traditional microblading creates individual hair-like strokes using a manual blade. This technique penetrates the skin at a relatively shallow depth, typically healing faster with less intensive aftercare requirements. Most clients can safely resume normal face washing around day 10 to 12 with traditional microblading.
Combo brows combine manual microblading strokes with machine-applied shading or stippling. The shaded portions involve broader surface coverage and slightly deeper pigment placement. This dual-technique approach typically requires the full 14-day water restriction because the shaded areas take longer to form and shed their protective scabs. During face washing, combo brow clients must be especially careful around the entire brow area, as the shaded sections cover more surface area than hair strokes alone.
Powder brows or ombre brows use a stippling technique that creates a soft, makeup-like appearance rather than individual strokes. This method covers the entire brow area with thousands of tiny pigment dots. Because the treatment involves complete brow coverage, healing takes longer and requires stricter water avoidance. Most powder brow clients should maintain water restrictions for 14 to 16 days and use extra caution when washing the forehead area.
If you’re considering different permanent makeup approaches, understanding these healing variations helps you plan appropriately. You can learn more about combo brows and how they differ from microblading to determine which technique best suits your lifestyle and schedule.
Frequently Asked Questions About Face Washing After Microblading
When can I wash my face after microblading?
You can wash your face immediately after microblading, but you must keep your eyebrows completely dry for 10 to 14 days. Cleanse your cheeks, nose, chin, and forehead using careful techniques while protecting your brow area from water, soap, or cleanser contact. After two weeks, gradually return to normal gentle face washing.
How do I wash my face without getting my microbladed eyebrows wet?
Use a barely damp washcloth or cotton pad rather than running water. Apply cleanser to the cloth for better control. Tilt your head backward to prevent water from running toward your brows, and create a barrier by holding a dry washcloth across your eyebrows while cleansing your forehead. Micellar water on cotton pads works best for maximum control.
What happens if my eyebrows accidentally get wet after microblading?
Immediately blot the area with a clean, dry tissue using gentle pressing motions without rubbing. Allow the area to air dry completely for 30 minutes before applying aftercare ointment. Brief contact with cool water typically causes minimal harm, but prolonged exposure can soften scabs prematurely, leading to pigment loss and patchy results.
When can I apply cleanser directly to my eyebrow area?
You can safely apply cleanser directly to your healed eyebrow area after 14 days, once all scabs have naturally shed and the skin has closed completely. Even then, use only gentle, fragrance-free cleansers without active ingredients. Wait the full 6 weeks until complete healing before using any products containing acids, retinol, or exfoliants on or near your brows.
How long does it take for microblading to fully heal?
Complete microblading healing takes 6 weeks (42 days). The critical healing period lasts 10 to 14 days while scabs form and shed. True color returns between days 14 to 28. Final color settles by week 6, when you return for your touch-up appointment to address any areas where pigment faded during healing.
Professional Microblading Care at Arezoo Beaute
Proper face washing during microblading healing directly impacts your final results, determining whether your brows heal with rich, even pigment retention or require extensive correction at your touch-up appointment. The 10 to 14 day water restriction period challenges your routine, but this temporary adjustment protects your investment and helps ensure the beautiful, natural-looking brows you expect from professional permanent makeup.
Following the detailed protocols provided by your microblading artist makes all the difference in your outcome. At Arezoo Beaute, Arezoo’s PHI certification and nine years of permanent makeup experience inform every aspect of client aftercare guidance. Our Montreal team provides personalized instructions based on your specific technique, skin type, and lifestyle factors to optimize your healing experience and final results.
Ready to achieve perfectly shaped, natural-looking brows that simplify your beauty routine? Our experienced team provides comprehensive consultation and aftercare support throughout your microblading journey. Book your consultation at our Rockland location or call (514) 814-8007 to discuss your permanent makeup goals with Montreal’s first PhiBrows Master.